Wednesday, July 10, 2013

Someone once told me that if you want to get better at sewing the first thing you need to do is quit those quick and easy sewing projects. A 30 minute skirt is a great project for a beginner, or somebody who is happy with off the rack style clothing, but not for someone who wants to master their skill.

I think I've reached a point in my sewing where I am ready to take that leap. I'm no longer happy with quick and simple, just like ready to wear items I've made. In fact I am not very happy with most of the ready to wear item's I've bought either. 

  • I want clothes that I love so much, I can wear them again and again and never get tired of them. Not more clothes than I know what to do with.
  • I want clothes that fit me like a second skin, that glide over my curves and flatter my figure. Not something that the fashion industry has decided is a “good enough” fit for most people.
  • I want clothes that will stand up to repeated washing and wearing, and on the off chance that they do get ripped or stained, I will care enough about them to fix them. Not clothes that are cheap enough to throw out when the seam comes apart after the first washing.
I want quality over quantity, and that is why quick sewing projects just aren't working for me anymore. What I don't want is a bunch of clothes that will amount to nothing more than clutter.

So that's the decision I've made when it comes to sewing clothes for myself. But what about the children?

Kids grow out of clothes so quickly. Is it really worth spending so much time on something that they're only going to wear for a little while?

For me it is because I currently have 6 nieces and nephews, with number 7 on the way, all of which are younger than my own children. And all of which are beyond worthy of high quality homemade hand - me -downs. Spending more time on each item means that they will last longer and still be in great condition by the time they are handed down.

If I am spending more time sewing each item, won’t I have to buy more ready to wear clothes to fill in the gaps?

If I am spending more time on each thing I sew for them, you have to assume that they are going to have less finished items. I don’t want to make up for it by buying them more low quality clothes, but I can't afford to buy them designer jeans.

That answer came to me when I was putting away their winter clothes. Most of the store bought items were in rough shape and ended up being cut up and made into play clothes for the summer. But two items stood out to me. A pair of Nikes and a Hannah Anderson long sleeve T shirt. They were both in impeccable condition. The Hannah Anderson T shirt looked almost brand new, and the Nikes only had slight wear and tear on them despite the fact that they had been worn almost every single day of that school year.

The best part, I had spent less than $10 on each of them. Turns out those more expensive clothes aren't just made well enough to be handed down. They are also made well enough to be purchased second hand.
Of course finds like these take a little bit of searching. I keep a Thred Up Pinterest board and every once in a while check to see if the items I pinned have been reduced in price yet. Usually the item sells out, but every once in while something great will slip through the cracks, just waiting for you to grab it up.

Which Brings Me To The Reason I Haven't Been Posting

Right now I am working on the Hawthorne dress from Colette Patters. I am on my third muslin and I have almost got the fit just right. Once I do, I’ll post pictures of the finished dress.

So what are your thoughts? To you prefer the instant gratification of a quick and easy sewing project, the lasting reward of a slow and meticulous sewing project, or a combination of both?

Thursday, June 27, 2013

July Sewing Events

I sometime think of sew-alongs like a drug addict would think of crack. Sure, too much of a good thing is bad for you, but who cares. Just look at this line up. How could I say no. And if my overflowing fabric stash grows a little bit more, or the kids miss a meal here and there, who's going to notice?

Colette's Hawthorne Sew Along June 26 - July 29


Hawthorn Dress Sewalong

Sarai kicks things off with the Hawthorne sew along. Technically it started yesterday with a post about choosing fabric and starting your muslin. You still have plenty of time to catch up, with another post coming up on the first about fitting, before they get into sewing the actual dress. 

As far as adult patterns go Colette patterns are the Pièce de résistance. 

I copied and pasted that word. Do you really think that I had any clue how to spell that. Besides I don't think my keyboard even has those characters.

Flip This Pattern: Oliver + S Rollerskate Dress


Flip This Pattern

Next up is Flip this pattern with the Oliver and S roller skate dress. This sew along starts on the 1st of the month and entries are do by the 20th. The goal is to change up the pattern, by adding interesting details and then add it to the sew along linky to be judged. Judged sounds so harsh. How about this.

You add it to the sew along linky to be compared and possibly granted prizes.
That sounds much nicer.

Basically Oliver and S do for children's patterns what Colette does for adult patterns. They are the pinnacle (another really cool word "p" word) of the sewing pattern world.

KCW Summer 


And last but not least we have kids clothes week, where we all agree to spend at least one hour a day sewing clothes for our kids and post pictures in the Flikr. Then we all look at each others pictures and ooh and ahh, and get started pinning outfit insperation for the next season.

Okay, it's actually way more fun than I made it sound. I kind of love it.

What sewing adventures do you have planned for July? Are joining any events or flying solo?

Tuesday, June 25, 2013

Matching Girl and Doll Skirts: A Tale of Two Patterns

The girl and doll skirts seen in yesterday’s post were made using two different patterns. They were designed by two different designers and sold by two different companies, and follow completely different construction techniques. But when finished they look exactly the same.

Patterns to Make Matching Girl and Doll Skirt

Liberty Jane sells a collection of doll clothes patterns from a variety of designers. Most of whom also sell their finished work. Sew Urban is the designer of the Savannah skirt that we will be using today.

Violette Field Threads is a pattern company owned and operated by two best friends, specializing in boutique style children’s clothing patterns. The designed the Vivienne skirt.

After sewing both patterns Savannah appears to be a mini me of Vivienne, but on closer inspection you see how unique each skirt really is.

I’ll start with the overskirt, since it is the first thing you see.

Overskirt

Matching Girl and Doll Skirt The Lachman Collection

Vivienne - The front of the over skirt is self-lined which makes for a beautiful polished finish but adds to the most significant problem with the pattern - the bulk in the waistband, especially after the flaps are overlapped.  The back of the overskirt is a single layer of fabric that is hemmed and then attached to the front at the side seams.

Savannah - The over skirt uses 4 pattern pieces, 2 for the front and two for the back creating a center back seam that we don’t see in the Vivienne pattern. All four pieces are sewn together and then hemmed as one piece.

Ruffles

Matching Girl and Doll Skirt The Lachman Collection

The only construction detail these patterns have in common is the ruffles. Both use a narrow hem and a row of ruffle stitches on the top. Pretty Slandered Stuff. The similarities ended when it was time to attach the ruffles to the underskirt.

Underskirt

Vivienne – To make the underskirt the front and back are sewn together at one side seam and then hemmed. The ruffles are then pinned and sewn in place across the length of the underskirt before being sewn together at the other side seam. This does add a tiny bit of bulk to one side seam that you don’t see in the other. After the overskirt is attached it won’t be noticeable.

Savannah - Each ruffle is first sewn onto a strip of fabric, Then the strips of fabric are sewn together crating the under skirt. The skirt is then sewn together at the center back seam. I’m still not a fan of the ruffles being sewn into the seam, but it does look a little bit more natural than having them sewn into only one side seam.

Waistband

Vivienne – The underskirt is attached and then flipped to the inside. A row of stitching creates the elastic casing. The waistband in the front is way too thick to insert elastic. Perhaps that is why the elastic is only inserted into the back of the skirt, or maybe it is to give the front a smoother finish. Either way it does affect the fit a little bit. The skirt will sag a little in the front if you don’t get the elastic tight enough in the back.

Savannah – A similar method is used for attaching the underskirt, but with only a single layer for the front flaps there is slightly less bulk. Elastic is inserted all the way around. It is still a bit of a challenge to get it past the seams but I managed.

Conclusion 

Matching Girl and Doll Skirt The Lachman Collection

I learned more about sewing while making to matching skirts from different patterns, than I ever could have learned from sewing either one of these skirts alone. If I were to sew the Vivienne skirt again I would incorporate a couple of the techniques form the Savanna skirt.
  • Use a single hemmed layer for the front flaps
  • Cut the Underskirt on the fold and sew together at the center back seam 
I hope you enjoyed my comparison of these to patterns. Don’t forget to subscribe to see more sewing projects for the whole family, including the dolls. 

Monday, June 24, 2013

If I Could Just Keep Her Wrapped In Ruffles Forever

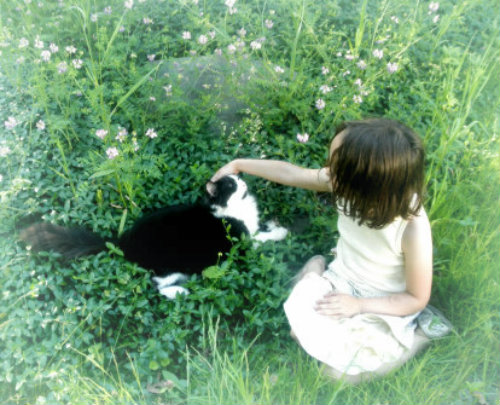
I'm holding my breath, thinking that maybe it will help slow time down. If I don't breath the moment won't pass, and then the next moment would take just a little bit longer to get here. We could sit here in this patch of flowers forever while I watch her play with her doll. 


I'm still not breathing. My son, at his wise old age of 11, teases her when she calls me Mommy. Pretty soon she won't want to call me Mommy any more and then it will just be Mom. Then nobody will ever call me Mommy again.

I have to breath now, and blink a little, just so that I don't cry. If I cry she will see me and ask why I'm sad. I don't want her to think I'm sad. I want her to know how happy she makes me. How proud I am of the amazing little girl that she is becoming.


I tilt my head because I think I see just a little bit more of myself in her today, than I did yesterday. That makes me worry that she will make the same mistakes that I did. 

But of course she won't. She will make her own mistakes, lots of them I'm sure. She will suffer her own broken hearts.  Maybe from a boy who won't realize how lucky he is to have her in his life, even if it is just for a little while. Maybe from her children, who will one day have to grow up as well. Probably both. My heart will break along with hers, because I want her to never be sad. 


I'm still breathing, but it's slow and controlled. I don't want this moment to end yet. I'm not ready. If I could keep her wrapped in ruffles and daisy shaped buttons for just a little bit longer, maybe just for forever. That would be long enough.


There are things that I should tell you, things about sewing, and matching girl and doll skirts. But I just can't today. I'm to busy savoring. We can talk about that stuff tomorrow. 

Friday, June 21, 2013

Girls Swimwear: Inspiration, Patterns and Fabric


Inspiration

How do you design?  For me the process always starts with inspiration. Sometimes I'll see an outfit in a movie or while browsing at the store. Other times I'll go looking for it. When I am looking for inspiration, I look for shapes, colors, and interesting details that appeal to me. 

Here are a few of the most inspiring swimsuits that I have found so far.


Patterns

The next step in my design process is the pattern. Most of the time my pattern choice will be based on the overall shape, but a pattern that can teach me something new is also a great find.

My favorite swimsuit patterns


Santa Monica Sweetheart Tankini                                                              Hang Ten Rash Guard


Kwik Sew Girls Swimsuits and Cover Ups

Fabric

The final stage of my design process, and my favorite part, is choosing the fabric. This step always takes the longest because I tend to get easily distracted in the huge selection of fabrics that are available. I can find something that I love in all of them.

Follow the links to some of my favorite swimsuit fabrics. 

Animal Print Swimsuit Fabric        Polka Dot Swimsuit Fabric        Floral Swimsuit fabric 

Tell me in a comment about your design process.

Tuesday, June 18, 2013

How One Extra Step Changes A Pattern From Elastic Waistband To Drawstring Waist


The goal of my second pattern flip was to make a pair of shorts to be donated to Haiti. The village that they are being sent to has requested drawstring shorts for children as well as pillowcase dresses.

How To Replace a Elastic Waistband With A Drawstring

For those who haven't heard yet, June's flip this pattern sew along project is Elegance and Elephants bubble pocket shorts, which features an elastic waistband.

Switching things up to make it work with a drawstring is a simple task that will only take an extra minute or two.

The Incredibly Simple Extra Step

Buttonholes. That's It. Sew two small buttonholes a few inches apart centered over the front of the waistband. Then finish the waistband as you normally would and string the drawstring through instead of elastic. Pull the ends through the buttonholes and your all finished.

How To Replace a Elastic Waistband With A Drawstring

I hope others will be inspired to sew for the children in Haiti. Shorts and Pillowcase dresses can be sent in until then end of June, and if you happen to use the Bubble Pocket Shorts like I did, be sure to add it to the Flip This Pattern Linkie before June 20th.

If you missed my first flip of this pattern you can see it here.


Monday, June 17, 2013

A Simple Summer Alternative to a Dress That is Perfect For Tomboys


My daughter hustled me out of 20 bucks last picture day. That’s what it costs to get her to wear a dress.

I want my children to love their clothes. I want them to feel free to express themselves. But from time to time an occasion comes up where jeans and a t shirt just aren't appropriate. 

Bubble Pocket Short Flip
Say hi to our new kitten Tigress!

Dresses and Skirts are out of the question. I just can't afford to bribe her, and I'm unwilling to force her to wear something that she hates. Dress Pants are always nice, but not very interesting, and they can be a little bit to warm for summer.

Shorts are a great alternative. With the right details they can easily fit into any semi formal setting. 

That was my inspiration for the Elegance and Elephants Bubble Pocket Shorts Pattern and my first entry into the June Flip this Pattern Sew Along

The details that took this beautiful pattern to boutique style shorts:

Boutique Details Brightly colored over sized buttons


Boutique Detail Double Ruffle

Another thing I loved about this pattern was the adjustable waist band, one of the most useful features in both ready to wear and hand-made clothes.

Come back tomorrow to see my second flip of the same pattern.


Flip This Pattern

If you have young girls do they love or hate to get dressed up? If not tell me how you feel about dressing up yourself. 

Tuesday, June 11, 2013

12 Reversible Sewing Projects To Save You Space

Reversible Sewing Patterns

Apparently Somebody in my house thinks that my sewing takes up to much space. And that very same somebody doesn't seem to think that their bajillion (or at least 15) gagety gizmos are taking up just as much space.

But I'm a fair woman. I am willing to compromise. 

Com - pro - mise 
Noun - An incredibly oppressive technique to end an argument, in which both spouses agree to end up a little bit unhappy, also a required element in any marriage that is going to last longer than 3 days.

So our compromise was that we could keep anything that we had room to put away. There are all kinds of ways that "put away" can be interpreted. But in the interest of peace, I'm try to sew up much of my stash before I start "interpreting" the agreement. 

My favorite stash busting projects are reversible because they use up twice as much fabric, but the finished product only takes up the space of one. 

I thought I'd share some of my favorite reversible stash busting projects with you, just in case you ever need to ... compromise.

Free Sewing Projects
Reversible Sewing Patterns

Monday, June 10, 2013

More Scrappy Doll Clothes


I finished this month's doll clothes sew along on time for a change, instead of waiting until the last possible second like I did last month. The great news is that I had already downloaded this month's free pattern.

Remember how I made the tank top to match last month's skirt sew along. Well imagine my surprise when that same tank top was announced as June's project the very next day. 


Of course I had to step things up a notch, this being the second time that I'm showing off a tank top in the sew along. This twisted flower detail that I learned in my Craftsy class (yes, it is the same class that I use to make the quilt) seemed perfect. Eventually I will make enough of these sweet little flowers to finish an entire pillow, which is another project for the class. 

Bonus: I used up more fabric scraps. However, my scrap pile doesn't seem to be getting any smaller. I think I'm adding more scraps to it, faster than I'm sewing them up!

Saturday, June 8, 2013

Baby Sewing Week - Gift # 3 Comfort


Living in Pennsylvania, the most comfortable day I could imagine involves sleeping in on a cold winter morning with a warm blanket rapped around me. That's why I chose to make a baby quilt for my third and final gift to the triplets. 

The great thing about quilts is that they are both functional and decorative. A beautiful quilt can make your whole room feel more comfortable. I've always enjoyed the luxury of owning a beautiful handmade quilt or two, but up until a week ago, had absolutely not interest in learning how to make one myself.

In fact, I honestly believed that the only way to make a quilt was to spend months or even years meticulously cutting and sewing tiny little scraps of fabric until your fingers bled. Silly Me! In fact since finishing this project I've found lots of other quilt patterns that can be finished in less than a week. 

This particular quilt is one of the many projects that I made while taking a single Craftsy Class taught by the author of Make It Sew Modern .

The class had so many projects in it, that I knew I would find something that I liked, and the way it is organized lets you do the projects in any order that you like, on your own schedule. If I decide to wait 10 years before starting the next project I will still have access to it. 

I love how thorough the instructor was, and how quick she was to respond to any questions. I've already signed up for my next class, The Ultimate T-Shirt. I'll let you know if it is as beneficial as the first one, once I get around to doing the lessons. I can tell you that it came with a free printable Vogue pattern, so I'm looking forward to it. 

Now that you have seen all three of my baby gifts, tell me about your gift giving style. Do you give practical, sentimental, or decorative gifts?

Tuesday, June 4, 2013

Baby Sewing Week - Gift #2 Tradition


My second gift to the triplets is the gift of tradition. I am giving a handmade baby bonnet that turns into a wedding handkerchief on her wedding day. When she has her first child she can turn it back into a bonnet.

This easy to make sentimental gift can be passed down from generation to generation. 

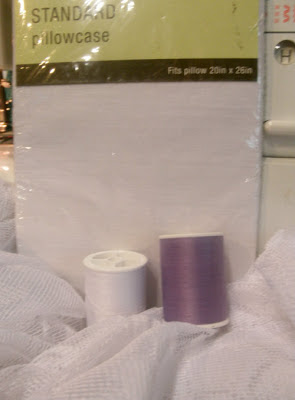
Wedding Hanky Bonnet Supplies

You Will Need
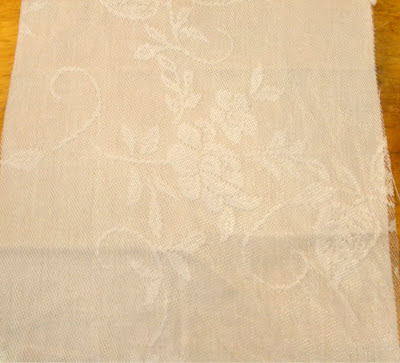
  • Fabric and Lace Fabric - I used a new standerd pillow case and a table cloth, but look for vintage for an extra special gift.
  • White Thread
  • Colored Thread - For Decoration
  • Sewing Machine
  • Cutting Tools
  • Ribbon 
Tutorial/How to Make

Cut a 12 inch by 12 inch square of both fabrics and lay them on top of one and other. Attach with a straight stitch close to the edge. From this point forward they will be treated as a single piece of fabric.


Wedding Hanky Bonnet Tutoial The Lachman Collction

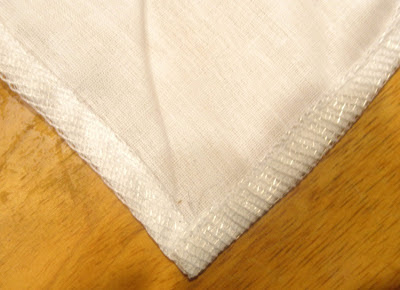
Sew a narrow hem around all four sides. Work in parallels. After hemming the first side go to the opposite side and hem. Then do the two remaining hems.

Wedding Hanky Bonnet Tutoial The Lachman Collction

Remove the white thread and bobbin from your machine and insert you decorative color. Choose a decorative stitch from your machine (I used a feather stitch) And sew one inch from the edge in a straight line around all four sides. You now have your wedding handkerchief. 

Wedding Hanky Bonnet Tutoial The Lachman Collction


Now we will form the bonnet. Fold two parallel sides under 2 and 1/2 inches each and press.

Wedding Hanky Bonnet Tutoial The Lachman Collction

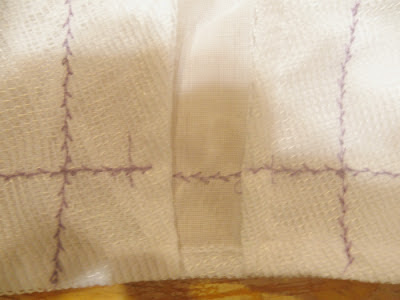
Adjust the setting on your machine so that your stitches are slightly larger. Sew a few small stitches on each of the four inside corners (see picture below) to hold the folds in place. These stitches are in contrasting thread so they will be easy to find and snip on the wedding day.

Wedding Hanky Bonnet Tutoial The Lachman Collction

Insert a length of ribbon into one of the casings .

Wedding Hanky Bonnet Tutoial The Lachman Collction

Gather the ribbon and fabric and tie it in a bow to form the back of the bonnet.

Wedding Hanky Bonnet Tutoial The Lachman Collction

Now slide two pieces of ribbon into the front and stitch each in place to make the ties for the bonnet front. I chose to switch back to white thread because the ribbon would make these stitches easy to find and snip, but you can use contrasting if you prefer.

Wedding Hanky Bonnet Tutoial The Lachman Collction

Now your bonnet is complete. You can include instructions in the gift, or use the poem below. There are many versions of this poem so do a quick Google search for the one you like the best.

Wedding Hanky Bonnet Tutoial The Lachman Collction


For a special baby
Loving thoughts and nimble hands
Created this little bonnet
Of fine lace and ribbon bands.

At first it was a handkerchief
But with some stitches small
A bonnet was made for downy head
To be admired by all.

Mother will carefully store it
Gently pack it away
After years she'll take it out
Before her daughter's wedding day.

She'll snip the tiny stitches
Place it in her daughter's hand
To carry, as a hanky, down the aisle
And receive her wedding band.

Mother's Son will find good use
For the square, when he's a young man
He'll give it to is sweetheart 
When he asks her for her hand.

If you missed gift # 1 you can see it here. Don't forget to look for gift # 3 which will be revealed later in the week.


Monday, June 3, 2013

Baby Sewing Week - Gift # 1 Versatility

It’s baby sewing week at The Lachman Collection. My sister’s triplets are coming home soon! I’m so excited. While she is busy preparing her house, I will be preparing the gifts.

I've never really enjoyed sewing the same thing twice, let alone three times, so I’ll be making a different gift for each baby. While I’m at it I’ll avoid the color pink, just to give the boys in the house a break.

Reversible Dress from Men's Dress Shirts

Gift # 1 – Versatility

The first of my three gifts is the gift of versatility, an important trait for every girl to have. I’m sure her mother will appreciate it as well. Everyone knows that when you have a baby girl, you have to have a ton of baby dresses. There for when you have 3 baby girls you have to have 3 tons of baby dresses. Imagine if every one of those dresses was reversible. Then you would only need 1.5 tons. That’s much more reasonable.

You can find a free pattern and tutorial for this versatile baby dress here. My version included the following changes.

  • Fabric – Used two men’s dress shirts, rather than fat quarters
  • Bottom – I pressed 5/8 inch of the hem to the inside and applied ric rac to the grey side so that the red stitching would not be visible.
  • Then I sewed another row of ric rac above it because ric rac is adorable.

Reversible Baby Dress from Men's Dress Shirts


Stay tuned all week. I have two more DIY baby projects coming up. Be sure to subscribe because you don’t want to miss it. 

Gift # 2 - Tradition 

Thursday, May 30, 2013

Scrap Busting with Doll Clothes

Do you have a go to scrap busting project? For me it’s doll clothes. Every month I participate in Karen Mom of Three’s doll clothes sew along.  Each month she links to a different free doll clothes pattern and then posts pictures of everyone’s completed work on her Facebook page.


In May we made a reversible wrap skirt with a Velcro closure. Another sewalonger used a button in place of the Velcro, a great option for people who don’t keep Velcro on hand. It was so quick and easy to make, I have no idea why I put it off until the end of the month.

I threw together this bonus tank top at the last minute as well.  It’s made with a free Liberty Jane pattern and a tank top that my girls had outgrown years ago. I cut out of a size 4/5 and  had just enough fabric, so anything smaller probably wouldn't work.

Doll clothes sewing is picking up in my house this summer. My  youngest daughter just got a new doll for her 7th  birthday, bringing our total up to 4 dolls; one American Girl Doll and 3 Madame Alexander Dolls. Then in September my older daughter will be making a trip to the American Girl Store, so we may expand our collection again.

I have two matching girl and doll projects coming up. One of the projects will be skinny jeans using this matching girl and doll pattern. The second will be skirts. I’ll give you more details later in the month.


In the meantime tell me about your favorite scrap busting project.

Wednesday, May 29, 2013

Saving Time Money and Gas - Quicker Summer Tops

Supposedly there is a heat wave on the way. I say supposedly because the news hasn't been very good at predicting the weather lately. But, just in case I am trying to get prepared.

My summer sewing got off to a good start last week, when I made these quick summer tops. Now I need a few quicker summer tops, because this heat wave is supposed to start tomorrow.

Living out in the middle of nowhere means that a trip to the store is a 45 minute drive each way, plus the time it takes to shop. I could sew a shirt in that amount of time. In fact I could do better than that.

½ hour + sharp scissors + thread = three summer tops

Here’s how.

I cut the sleeves off three long sleeve shirts. They’ll grow out of these before they need long sleeves again.


Then I hemmed the sleeves with a simple straight stitch on my machine.


I cut a Hello Kitty Applique out of an old pair of winter pajamas. 
It already had a border so I used a straight stitch again to attach it to the black t- shirt.


There you go, 30 minutes to three quick and free summer tops. Save your gas. Don’t go to the store, you have everything you need at home.

Monday, May 27, 2013

My Evolving Signature Style

Project Sewn has once again forced me ask myself some tough questions. I wonder if they knew from the start that they were leading their followers on a journey of self discovery. This week I had to ask myself what my signature style was.

How do the clothes I choose to wear define who I am? What message do I tell the people around me without ever saying a word?

A signature style is what you are known for. It says something about you. Classic, sporty, earthy… It could be anything.

Most days I just throw on one of my six pairs of black yoga pants and whatever stretched out t-shirt happens to be at the top of the drawer. So what does my style say about me? The only word that comes to mind is "indifferent". Not exactly the message I want to portray, and it doesn't reflect who I feel I am either.

This article is getting some attention from the sewing and fashion communities. It is about how people dress now compared to the past, and what it says about them.

Personally, I won’t be wearing gloves and a hat on my next trip to the grocery store, but I will think twice before wearing something that could pass for pajamas.

Despite all of the thinking and reading I've done, I still have no clue what my signature style is.

Because this is a sewing completion, I am bound mostly by my sewing ability.

I started with a simple refashion for the pants. They're a mix of the skinny jeans that are popular now and a retro high-water style pant. I think I  hit the mark with them. I love the style and the fit, and they work great with my lifestyle.


Coming up with a top was much more frustrating. It took three attempts to find a pattern that I could actually sew and that fit me well with the few adjustment I know how to make.

I ended up using a free Colette pattern, which was amazing. It was more professional than most of the paid patterns I have used, and reading it felt like being taught how to sew by a friend. Since I also own her  book, I used that as a reference for adjustments.


Despite loving the pattern, I don’t think I would call this shirt my signature.  I’m sure that my style will evolve as my sewing skills improve. But for now I will call this look my signature style in progress.
Related Posts Plugin for WordPress, Blogger...