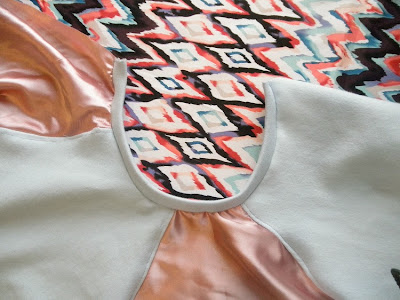
Q: What do you sew for a girl who considers herself a tomboy but still loves the color pink (in moderation) and loves the feel of soft fabrics on her skin?
A: A mixed fabric Raglan Tee
Do you want to make one for yourself? No problem. Just follow the steps below.
You will need:
- Rib Knit Fabric - You can use any type of knit for the main fabric, but you need rib knit for the collar. The fabric I used is currently out of stock but here is something similar.
Cotton Baby Rib Knit Pale Blue
I used about a half a yard with some left over.
- Sleeve fabric - I used a satin fabric with just a tiny bit of stretch for comfort. Again, out of stock but here it is in a darker color.
Tahari Stretch Satin Dark Pink
You only need about a quarter yard of this
- Thread to match your main fabric
- Paper for Tracing
- Hem Gauge
- A T shirt or tank top that fits well
- Straight edge with a square corner (a sheet of paper will work)
Step 1: Trace your T- shirt or tank top. We will be drawing a new sleeve later so don't worry about that. I chose to use the back collar for a tighter neckline. If you want a lower neckline you can fold the back neckline under and trace the neckline from the front of the tee. Remember we will be adding 3/4 of an inch with the neck binding.
Step 2: Add a 1 inch seam allowance to the bottom for the hem and a quarter inch to the side seam and collar. You don't need to add anything to the shoulder but I did for a slightly looser sleeve because the fabric did not have much stretch. The easiest way to add the seam allowance is with a hem gauge.
Step 3: Make the Sleeve. If objects in your house mysteriously disappear and you can't find your ruler grab a piece of paper. Draw a straight line from the point of the armpit to 1 inch from the edge of the collar. Then use the corner of the paper to help draw the rest of the sleeve.
Step 4: Cut out your pattern. Don't forget to add the seam allowance. Align a piece of paper behind your pattern piece with a quarter inch hanging over the edge. Then, tape in place and trim.
Step 5: Cut two of your main fabric and two of your sleeve fabric. Then, cut one long strip of your rib knit 1 and a half inches wide and as long as you can make it. We will trim it later.
Step 6: Pin your sleeve edges to one piece of main fabric and baste. (I know that your eyes just glossed right over the basting part, but if you are using a slippery fabric please don't skip it.)
Step 7: Attach the the back of the shirt to one of the sleeves but not both so it will open up like this. Sew up your seams using your favorite knit sewing method. Press your seams to the main fabric. Remember to set your iron to the setting for the most delicate of the two fabrics. Then flip your shirt and press again. You can also top stitch 1/8 inch from the seam on the main fabric.
Step 8: Now grab that long strip of fabric you cut earlier and fold it in half lengthwise. Press. Line the raw edges up to the raw edges of the neckline on the right side. Now this is the tricky part. In order for the neck binding to maintain the correct shape you have to stretch the binding just a little bit while sewing without stretching the neckline on the shirt. Just take your time and adjust as you go. Trim off the extra.
Step 9: Pin, Baste and Sew your last sleeve edge to the main fabric. Sew all the way to the top including the neck binding with right sides together.
Step 10: Hem the sleeve edges (I used a narrow hem) and the bottom of the shirt.
Step 10: Sew up your side seams. ( No picture, but its just two straight seems) and try on your shirt!


