Showing posts with label 18 inch doll. Show all posts

Monday, March 17, 2014

5 Minute Tulip Skirt for 18 Inch Dolls : Free Doll Clothes Sewing Tutorial


Here is the tutorial I promised for a quick and easy skirt for your 18 inch dolls. You can make the skirt with left over scraps of any knit fabric. I like to use an old T shirt. In order to make this skirt work with the least amount of fabric, making it a perfect scrap project I omit seam finishes that won't show on the outside. Because we are using knit you don't have to worry about fraying.

Supplies


  • Knit Fabric Scrap: 13 inches wide by 5 inches for a mini skirt. Add one inch for knee length or 2 inches for below the knee.
  • 11.5 inches of 1/2 in. elastic
  • Coordinating Thread
  • Any standard sewing machine with an adjustable zigzag stitch.
Step One: Turn 3/4 of an inch of fabric to the wrong side and stitch in place. This will become your elastic casing. 


 Step 2: Insert elastic into casing and stitch ends in place.


 Step 3: With right sides together fold skirt in half and stitch closed with a quarter inch seam allowance. This will become the center back seam. Trim ends of elastic.


 Step 4: Complete the skirt with a lettuce hem. A lettuce edge can be done with a standard sewing machine as long as you can adjust the width of your zigzag stitch. Practice on a piece of scrap if you have never done this before. You will see that you can adjust the size of the waves by adjusting the amount that you stretch the fabric as you sew. You will want to clean your machine out as soon as you are done, because this technique always seems to leave a ton of lint behind.


  • Set you machine to a long tight zigzag stitch
  • Start sewing at the center back seam
  • Line the fabric up so the stitch reaches right to the edge of the hem but does not go over or cause the fabric to curl in on itself as you sew
  • Stretch the fabric while you are sewing
  • When you reach the center back seam where you started you can stop or go over it one more time to fill in any missed areas.


 Step 5: Try your new skirt on your doll


Thanks for checking out my tutorial. Doll clothes are my favorite thing to sew and I planning to add more tutorials for both doll clothes and matching girl and doll outfits in the future. Check out my archives in the meantime. If you would like to see more subscribe to my blog via your favorite method. 

Feel free to post a link in the comments section if you want to share a picture or blog post of what you made using this tutorial. 

Thursday, March 13, 2014

St. Patrick's Day Dresses for 18 inch Dolls

The great thing about this holiday day is that you can make absolutely anything green and call it St. Patty's Day outfit. So this week I gathered up some green from my stash and sewed up a couple of good luck dresses for our dolls. 


Mia (the dark haired doll) is quickly becoming one of my favorite dolls to photograph I just love her features and the range of motion in her head that you don't get with the American Girls Dolls. If only I could get the pen marks off of her face. I would love some tips for getting ink off of dolls without damaging the paint if anyone knows any.


Her Dress is made from a thrifted T-shirt that has been sitting in my refashion pile for over a year now. I was originally drawn to the beautiful shade of green and the darling little hearts, but unfortunately I didn't think about the the complete lack of recovery in the fabric, so the dress may not last very long before it becomes completely misshapen. Sadly the tights are destined for the same fate. They are made with a cheap rib knit that I picked up from a local discount store, and also has no recovery.

Despite the problems with the fabric, I do love the pattern. I used Eden Ava Couture's Peppermint Snow Pattern for the dress and tights, as well as the shirt on the second doll.


Caroline's tulip skirt was made using leftover scraps from the dress. This is one of my favorite doll skirts to make and it only takes about 5 minutes. Keep checking back. I'll post a tutorial soon so you can make your own 5 minute tulip skirts for your dolls. 

Thursday, February 27, 2014

Liberty Jane Dress Form for 18 Inch Dolls: A Review


This past weekend I took a little bit of time to sew up the 18 inch doll dress form pattern by Liberty Jane. The pattern has been sitting unused in my stash for a while. Now that Isabelle, the 2014 American Girl Doll of the year, has come out with a dress form as part of her collection, I thought it was time to make one for myself.

The Fit

The pattern description says that it is perfectly proportioned to fit 18 inch doll clothes, which is something I have to disagree with. The clothes do fit on the dress form, and it works well enough for a doll prop or even making some small changes on an existing doll outfit, but it's not quite right for draping and drafting your own doll patterns, if that is what you are interested in. I used an American Girl Doll for the test, but the proportions may be better on a different brand.


After trying the same dress on our American Girl Doll and then on the dress form, it was clear that the dress form was slightly different in both size and distribution. 

The Supplies

I found this awesome candlestick at a thrift store for $2 and fell in love with it. While I was there I picked up a teddy bear for $1 and murdered it for it's stuffing. Thank goodness the kids didn't see or there would have been some serious drama. The fabric and other supplies I already had on hand. This dress form is held to the base with hot glue but I think I will use something stronger for the next one.


The Difficulty Level

This was a fairly easy project to sew. The most difficult part was attaching the top part of the side panel to the shoulder seam, which requires you to sew very slowly and accurately. I would recommend basting that part by hand before machine sewing to keep your fabric edges lined up. Liberty Jane describes the skill level as easy. I would say it is a project for an ambitious beginner who already has a few projects under their belt.

My girls have asked me to make them a dress form to play with. I'm going to see what changes I can make to correct the fit. Once I'm done I'll report back for anyone interested in a more functional doll dress form. If you've tried the pattern please share what you liked or didn't like or changed about it in the comments.

Another doll sewing enthusiast whose blog I love to read, also made this pattern recently. Check out GiGi's Doll and Craft Creations for some more great idea's on design and supplies for the dress form.

Tuesday, June 25, 2013

Matching Girl and Doll Skirts: A Tale of Two Patterns

The girl and doll skirts seen in yesterday’s post were made using two different patterns. They were designed by two different designers and sold by two different companies, and follow completely different construction techniques. But when finished they look exactly the same.

Patterns to Make Matching Girl and Doll Skirt

Liberty Jane sells a collection of doll clothes patterns from a variety of designers. Most of whom also sell their finished work. Sew Urban is the designer of the Savannah skirt that we will be using today.

Violette Field Threads is a pattern company owned and operated by two best friends, specializing in boutique style children’s clothing patterns. The designed the Vivienne skirt.

After sewing both patterns Savannah appears to be a mini me of Vivienne, but on closer inspection you see how unique each skirt really is.

I’ll start with the overskirt, since it is the first thing you see.

Overskirt

Matching Girl and Doll Skirt The Lachman Collection

Vivienne - The front of the over skirt is self-lined which makes for a beautiful polished finish but adds to the most significant problem with the pattern - the bulk in the waistband, especially after the flaps are overlapped.  The back of the overskirt is a single layer of fabric that is hemmed and then attached to the front at the side seams.

Savannah - The over skirt uses 4 pattern pieces, 2 for the front and two for the back creating a center back seam that we don’t see in the Vivienne pattern. All four pieces are sewn together and then hemmed as one piece.

Ruffles

Matching Girl and Doll Skirt The Lachman Collection

The only construction detail these patterns have in common is the ruffles. Both use a narrow hem and a row of ruffle stitches on the top. Pretty Slandered Stuff. The similarities ended when it was time to attach the ruffles to the underskirt.

Underskirt

Vivienne – To make the underskirt the front and back are sewn together at one side seam and then hemmed. The ruffles are then pinned and sewn in place across the length of the underskirt before being sewn together at the other side seam. This does add a tiny bit of bulk to one side seam that you don’t see in the other. After the overskirt is attached it won’t be noticeable.

Savannah - Each ruffle is first sewn onto a strip of fabric, Then the strips of fabric are sewn together crating the under skirt. The skirt is then sewn together at the center back seam. I’m still not a fan of the ruffles being sewn into the seam, but it does look a little bit more natural than having them sewn into only one side seam.

Waistband

Vivienne – The underskirt is attached and then flipped to the inside. A row of stitching creates the elastic casing. The waistband in the front is way too thick to insert elastic. Perhaps that is why the elastic is only inserted into the back of the skirt, or maybe it is to give the front a smoother finish. Either way it does affect the fit a little bit. The skirt will sag a little in the front if you don’t get the elastic tight enough in the back.

Savannah – A similar method is used for attaching the underskirt, but with only a single layer for the front flaps there is slightly less bulk. Elastic is inserted all the way around. It is still a bit of a challenge to get it past the seams but I managed.

Conclusion 

Matching Girl and Doll Skirt The Lachman Collection

I learned more about sewing while making to matching skirts from different patterns, than I ever could have learned from sewing either one of these skirts alone. If I were to sew the Vivienne skirt again I would incorporate a couple of the techniques form the Savanna skirt.
  • Use a single hemmed layer for the front flaps
  • Cut the Underskirt on the fold and sew together at the center back seam 
I hope you enjoyed my comparison of these to patterns. Don’t forget to subscribe to see more sewing projects for the whole family, including the dolls. 

Monday, June 10, 2013

More Scrappy Doll Clothes


I finished this month's doll clothes sew along on time for a change, instead of waiting until the last possible second like I did last month. The great news is that I had already downloaded this month's free pattern.

Remember how I made the tank top to match last month's skirt sew along. Well imagine my surprise when that same tank top was announced as June's project the very next day. 


Of course I had to step things up a notch, this being the second time that I'm showing off a tank top in the sew along. This twisted flower detail that I learned in my Craftsy class (yes, it is the same class that I use to make the quilt) seemed perfect. Eventually I will make enough of these sweet little flowers to finish an entire pillow, which is another project for the class. 

Bonus: I used up more fabric scraps. However, my scrap pile doesn't seem to be getting any smaller. I think I'm adding more scraps to it, faster than I'm sewing them up!

Thursday, May 30, 2013

Scrap Busting with Doll Clothes

Do you have a go to scrap busting project? For me it’s doll clothes. Every month I participate in Karen Mom of Three’s doll clothes sew along.  Each month she links to a different free doll clothes pattern and then posts pictures of everyone’s completed work on her Facebook page.


In May we made a reversible wrap skirt with a Velcro closure. Another sewalonger used a button in place of the Velcro, a great option for people who don’t keep Velcro on hand. It was so quick and easy to make, I have no idea why I put it off until the end of the month.

I threw together this bonus tank top at the last minute as well.  It’s made with a free Liberty Jane pattern and a tank top that my girls had outgrown years ago. I cut out of a size 4/5 and  had just enough fabric, so anything smaller probably wouldn't work.

Doll clothes sewing is picking up in my house this summer. My  youngest daughter just got a new doll for her 7th  birthday, bringing our total up to 4 dolls; one American Girl Doll and 3 Madame Alexander Dolls. Then in September my older daughter will be making a trip to the American Girl Store, so we may expand our collection again.

I have two matching girl and doll projects coming up. One of the projects will be skinny jeans using this matching girl and doll pattern. The second will be skirts. I’ll give you more details later in the month.


In the meantime tell me about your favorite scrap busting project.

Saturday, April 13, 2013

Dolly and Me Yoga Pants Refashion

This refashion project was seriously one of the quickest and easiest I have ever accomplished.  I finished both pairs of pants in 1 hour. This is the perfect project for nap time crafting moms, or maybe for a aunt needs a last minute birthday gift for their lucky niece. 

Dolly and Me Yoga Pants


It all started with me cleaning the winter clothes out of my dresser and closet. We have very little space (5 people share 1 closet and 2 dressers) so this season I am trying something new.

At the beginning of the winter I put a safety pin in the tag of every piece of winter clothing I owned. Whenever I wore something I took the pin out. This week I took all of the winter clothes out to get them ready for storage and anything with a safety pin still in it went into the refashion bin, or if it was in really bad shape, the recycling bin.

I was surprised to find that almost a quarter of my clothes still had safety pins in them. I can't believe I have been letting them take up such valuable real estate for so long.

The only problem was that my refashion bin was overflowing, so I got started on a project right away.

Making The Doll Pants

Karen Mom of Three's Craft Blog hosts a monthly doll clothes sew along that is usually very refashion friendly. This month's sew along was for yoga pants from the sleeve of a woman's shirt. I used a sweater knit three quarter sleeve black shirt with an interesting trim. It ended up in the bin because it was just a little to tight on me. (I had pictures of the original shirt and pants that I used but they accidentally got deleted.)

18 inch Doll Yoga Pants with Link To Free Tutorial

To make the doll pants, just follow the link on Karen's blog post for the tutorial.

This part of the project used up one sleeve and only 15 minutes of time. One sleeve didn't make much of a dent in my overflowing bin.

Next I grabbed a pair of my own black yoga pants out of the bin. There was absolutely nothing wrong with the pants. I just happen to own 5 pairs of plain black yoga pants so they never had a chance to make it into the rotation. I figured my daughter would love a pair of pants to match her doll.

I've never met a 6 year old girl doesn't love to dress like her doll!

Making the Girl Pants

This project used a little bit more time; about 45 minutes. I also used this printable pattern. (affiliate link) to get the size right.  

Refashion Project - Girls Yoga Pants

The first step is turning the pants into fabric. The waistband has to be cut off and saved for another project. Then, cut up the center of the pants as shown below.
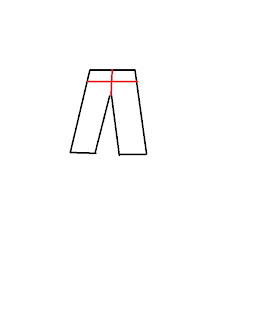
Cutting Lines for Yoga Pants
This is my very high tech artistic drawing done in Windows Paint!

What is left is two legs. If you cut the inseam of the leg you now have two pieces of fabric with the outer seam still in tact.

Layer the two pieces of fabric on top of one another with right sides together, and the seams lined up. Then lay the leg pattern piece on top centered over the seam, and cut.

By the time I got to the waist band I didn't have a big enough piece of fabric left, so I grabbed the sweater knit top. The sweater had a lot more stretch than the pants so I cut this pattern piece two sizes smaller, and still had to take it in a little bit.

The rest is just a matter of following the instructions on the pattern. It goes together really easy.

Dolly and Me Yoga Pants

You can see more pictures of my daughter playing with her doll on my Facebook page. It's a public page, but feel free to send me a friend request.

Great News! I have been accepted as a contributor to Refashion Co-Op. Look for more of my refashions there.

I am adding this post to Look What I made Wednesday 

Tuesday, March 5, 2013

Making Doll Clothes From Children's Clothes Patterns And Turorials

Sewing doll clothes has been a hobby of mine ever since my daughter got her first American Girl Doll for Christmas. I just couldn't justify paying for the clothes on the website. They are overpriced for the quality and fabrics that they use. (Tip: If you don't sew check etsy for some reasonably priced handmade doll clothes that are better quality than the official American Girl doll clothes.) But once you start making your own it really is addicting. The doll develops her own personality and you can tailor her wardrobe to fit it.

There are plenty of patterns available on the market for doll clothing. One source is Liberty Jane. While they offer a huge selection, sometimes they don't have exactly what I am envisioning. Besides when you want to make a matching outfit for a girl and doll it is much easier to start with a bigger pattern and downsize it than it is to start with a doll pattern and adjust it to your child's size.

For those reasons I have been working on making doll clothes from children's patterns and tutorials. I just finished up this fairy costume for a photo contest. It was made using a tutorial for a toddler romper and fairy skirt.
Fairy costume for 18 inch doll like American Girl
I started by using this tutorial from the Little Pink Monster blog. I made the following changes to fit our doll.

  • I used a 9 inch by 16 inch rectangle of knit fabric with a 40% stretch. Because I used fabric instead of a t-shirt I had to hem the bottom myself just before sewing up the back seam.
  • I sewed 7 lines 1/2 inch apart with elastic thread to create the smocking. 
  • I didn't notice any additional shrinking after the first time I sprayed it and went over it with an iron. If your trying to save time, once may be enough.
  • For the straps I sewed a 1 inch wide tube of fabric and turned it, then I hand sewed them in place while the outfit was on the doll to be sure they were placed properly. I matched the stitching to the smocking lines in the back and covered the stitching with flowers from my stash in the front.
  • For the skirt I cut a 16 by 7 inch rectangle and then created an elastic casing and inserted an 11 1/4 inch strip of elastic. I did not permanently attach it, so that it could be used with other doll clothes.
  • I cut the petals very carefully while the doll was wearing the skirt.
I'll tell you a little more about this photo contest (and beg for votes) a little later. I also plan on showing you how to adjust a pdf printed pattern to fit an 18 inch American Girl Doll. So what do you think of our finished work?
 photo blogbutton_zpsb1fa0f6d.jpg
Related Posts Plugin for WordPress, Blogger...