Showing posts with label diy baby gift. Show all posts

Saturday, June 8, 2013

Baby Sewing Week - Gift # 3 Comfort


Living in Pennsylvania, the most comfortable day I could imagine involves sleeping in on a cold winter morning with a warm blanket rapped around me. That's why I chose to make a baby quilt for my third and final gift to the triplets. 

The great thing about quilts is that they are both functional and decorative. A beautiful quilt can make your whole room feel more comfortable. I've always enjoyed the luxury of owning a beautiful handmade quilt or two, but up until a week ago, had absolutely not interest in learning how to make one myself.

In fact, I honestly believed that the only way to make a quilt was to spend months or even years meticulously cutting and sewing tiny little scraps of fabric until your fingers bled. Silly Me! In fact since finishing this project I've found lots of other quilt patterns that can be finished in less than a week. 

This particular quilt is one of the many projects that I made while taking a single Craftsy Class taught by the author of Make It Sew Modern .

The class had so many projects in it, that I knew I would find something that I liked, and the way it is organized lets you do the projects in any order that you like, on your own schedule. If I decide to wait 10 years before starting the next project I will still have access to it. 

I love how thorough the instructor was, and how quick she was to respond to any questions. I've already signed up for my next class, The Ultimate T-Shirt. I'll let you know if it is as beneficial as the first one, once I get around to doing the lessons. I can tell you that it came with a free printable Vogue pattern, so I'm looking forward to it. 

Now that you have seen all three of my baby gifts, tell me about your gift giving style. Do you give practical, sentimental, or decorative gifts?

Tuesday, June 4, 2013

Baby Sewing Week - Gift #2 Tradition


My second gift to the triplets is the gift of tradition. I am giving a handmade baby bonnet that turns into a wedding handkerchief on her wedding day. When she has her first child she can turn it back into a bonnet.

This easy to make sentimental gift can be passed down from generation to generation. 

Wedding Hanky Bonnet Supplies

You Will Need
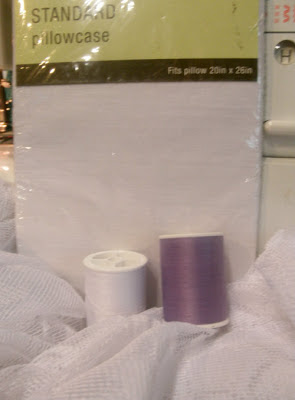
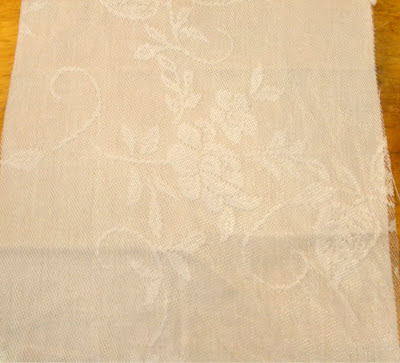
  • Fabric and Lace Fabric - I used a new standerd pillow case and a table cloth, but look for vintage for an extra special gift.
  • White Thread
  • Colored Thread - For Decoration
  • Sewing Machine
  • Cutting Tools
  • Ribbon 
Tutorial/How to Make

Cut a 12 inch by 12 inch square of both fabrics and lay them on top of one and other. Attach with a straight stitch close to the edge. From this point forward they will be treated as a single piece of fabric.


Wedding Hanky Bonnet Tutoial The Lachman Collction

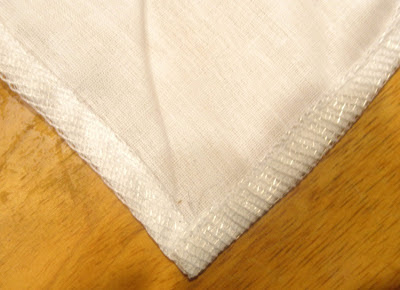
Sew a narrow hem around all four sides. Work in parallels. After hemming the first side go to the opposite side and hem. Then do the two remaining hems.

Wedding Hanky Bonnet Tutoial The Lachman Collction

Remove the white thread and bobbin from your machine and insert you decorative color. Choose a decorative stitch from your machine (I used a feather stitch) And sew one inch from the edge in a straight line around all four sides. You now have your wedding handkerchief. 

Wedding Hanky Bonnet Tutoial The Lachman Collction


Now we will form the bonnet. Fold two parallel sides under 2 and 1/2 inches each and press.

Wedding Hanky Bonnet Tutoial The Lachman Collction

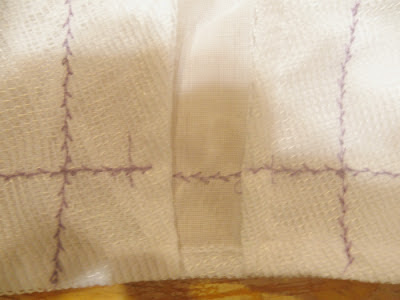
Adjust the setting on your machine so that your stitches are slightly larger. Sew a few small stitches on each of the four inside corners (see picture below) to hold the folds in place. These stitches are in contrasting thread so they will be easy to find and snip on the wedding day.

Wedding Hanky Bonnet Tutoial The Lachman Collction

Insert a length of ribbon into one of the casings .

Wedding Hanky Bonnet Tutoial The Lachman Collction

Gather the ribbon and fabric and tie it in a bow to form the back of the bonnet.

Wedding Hanky Bonnet Tutoial The Lachman Collction

Now slide two pieces of ribbon into the front and stitch each in place to make the ties for the bonnet front. I chose to switch back to white thread because the ribbon would make these stitches easy to find and snip, but you can use contrasting if you prefer.

Wedding Hanky Bonnet Tutoial The Lachman Collction

Now your bonnet is complete. You can include instructions in the gift, or use the poem below. There are many versions of this poem so do a quick Google search for the one you like the best.

Wedding Hanky Bonnet Tutoial The Lachman Collction


For a special baby
Loving thoughts and nimble hands
Created this little bonnet
Of fine lace and ribbon bands.

At first it was a handkerchief
But with some stitches small
A bonnet was made for downy head
To be admired by all.

Mother will carefully store it
Gently pack it away
After years she'll take it out
Before her daughter's wedding day.

She'll snip the tiny stitches
Place it in her daughter's hand
To carry, as a hanky, down the aisle
And receive her wedding band.

Mother's Son will find good use
For the square, when he's a young man
He'll give it to is sweetheart 
When he asks her for her hand.

If you missed gift # 1 you can see it here. Don't forget to look for gift # 3 which will be revealed later in the week.


Monday, June 3, 2013

Baby Sewing Week - Gift # 1 Versatility

It’s baby sewing week at The Lachman Collection. My sister’s triplets are coming home soon! I’m so excited. While she is busy preparing her house, I will be preparing the gifts.

I've never really enjoyed sewing the same thing twice, let alone three times, so I’ll be making a different gift for each baby. While I’m at it I’ll avoid the color pink, just to give the boys in the house a break.

Reversible Dress from Men's Dress Shirts

Gift # 1 – Versatility

The first of my three gifts is the gift of versatility, an important trait for every girl to have. I’m sure her mother will appreciate it as well. Everyone knows that when you have a baby girl, you have to have a ton of baby dresses. There for when you have 3 baby girls you have to have 3 tons of baby dresses. Imagine if every one of those dresses was reversible. Then you would only need 1.5 tons. That’s much more reasonable.

You can find a free pattern and tutorial for this versatile baby dress here. My version included the following changes.

  • Fabric – Used two men’s dress shirts, rather than fat quarters
  • Bottom – I pressed 5/8 inch of the hem to the inside and applied ric rac to the grey side so that the red stitching would not be visible.
  • Then I sewed another row of ric rac above it because ric rac is adorable.

Reversible Baby Dress from Men's Dress Shirts


Stay tuned all week. I have two more DIY baby projects coming up. Be sure to subscribe because you don’t want to miss it. 

Gift # 2 - Tradition 
Related Posts Plugin for WordPress, Blogger...